在之前的文章我们使用 Hexo + Next 创建了一个博客,并且使用 Github Action 实现了自动部署功能。但默认的 Next 主题还是有些简单,接着我们来给博客添加一些个性化配置。
语言和时区
默认 next 会使用英文,修改为中文并选择时区为 Asia/Shanghai。修改 _config.yml
1 | # Site |
启用搜索功能
我认为一个博客肯定需要有搜索功能,当文章多了之后能够快速的根据关键字搜索。效果如下:
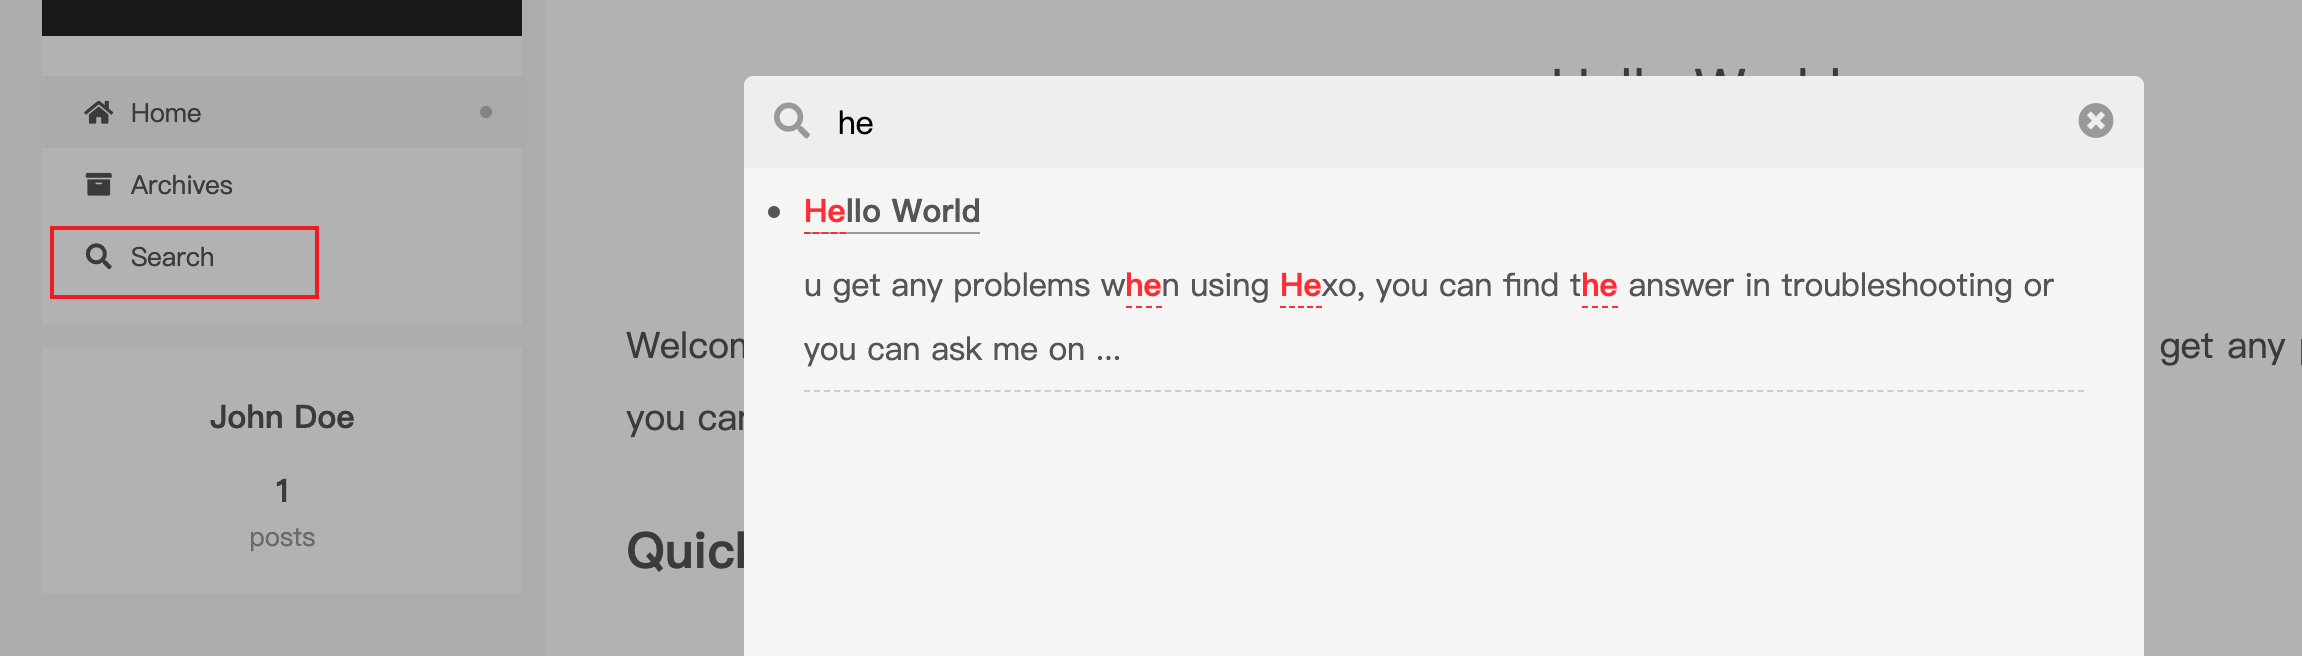
搜索功能需要先安装 hexo-generator-searchdb 插件
1 | $ npm install hexo-generator-searchdb --save |
然后首先在 _config.yml 文件最后添加以下内容
1 | # search |
还要在 _config.next.yml 中找到 local_search 配置,将 enable 改为 true
1 | # Local Search |
显示文章更新时间
效果如下:

当文章有更新时间这个属性时,next 默认就会显示。所以主要是如何给文章添加更新时间。先来了解一下 scaffolds/post.md 文件。当我们使用 hexo new 创建一篇新文章时就会以这个文件作为模板。在这个模板中添加 update 字段。
1 |
|
然后在已有的文章中也添加这个字段,注意的就是在更新文章后需要手动修改这个字段的值。如果没有成功显示,在 _config.next.yml 中查看 post_meta 字段中的 updated_at 是否为 true
1 | # Post meta display settings |
计算文章字数和阅读时间
显示每篇文章包含多少字以及预计阅读时间,效果如下:

首先需要安装 hexo-word-counter 插件
1 | $ npm install hexo-word-counter --save |
修改 _config.yml
1 | # 计算阅读时间 |
awl– 平均字节长度(Average Word Length)。默认为4CN ≈ 2EN ≈ 5RU ≈ 6
wpm– 每分钟阅读字数(Words Per Minute)。默认为275Slow ≈ 200Normal ≈ 275Fast ≈ 350
如果文章中大多中文,那么设置*awl*为*2*,*wpm*为*300*比较合适。
接着在 _config.next.yml 中找到 symbols_count_time 配置
1 | # Post wordcount display settings |
代码块
代码块的主题配置,效果如下:

修改 _config.next.yml
1 | codeblock: |
支持切换主题颜色
安装 hexo-next-darkmode 插件
1 | $ npm install hexo-next-darkmode --save |
在 Next 主题的 _config.next.yml 配置文件里添加以下内容
1 | # Darkmode JS |
isActivated: true:默认激活暗黑 / 夜间模式,请始终与saveInCookies: false、autoMatchOsTheme: false一起使用
右上角添加GitHub连接
效果如下:
- 1.首先到 GitHub Corners 或者 GitHub Ribbons 选择自己喜欢的图标,然后
copy相应的代码 - 2.然后将刚才复制的代码粘贴到
themes/next/layout/_layout.swig文件中<div class="headband"></div>下面一行 - 3.把代码中的
href后面的值替换成你要跳转的地址,比如你的GitHub主页
访问人数和阅读统计

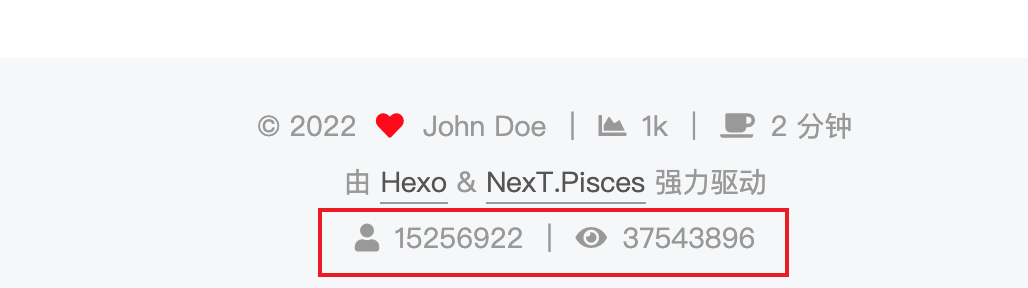
NexT主题已集成了不蒜子的访客人数和文章阅读统计功能,修改 _config.next.yml。
1 | # Show Views/Visitors of the website/page with busuanzi. |
注意:在本地运行时不蒜子显示的数据会是假的,部署后就正常了
添加 RSS 支持
首先需要安装 hexo-generator-feed 插件
1 | $ npm install hexo-generator-feed --save |
接着修改 Hexo 的 _config.yaml
1 | feed: |
Next 提供了两个地方进行RSS展示,修改_config.next.yml文件
在菜单栏显示
1 | # Usage: `Key: /link/ || icon` |
在文章底部显示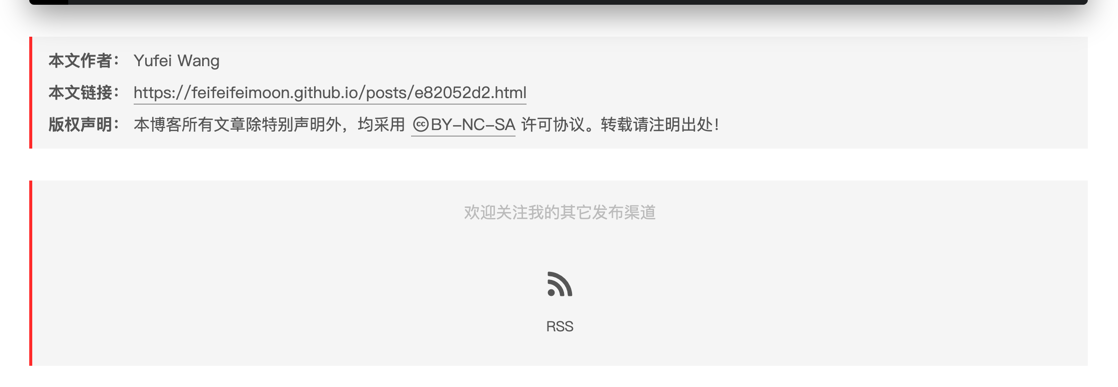
1 | # Subscribe through Telegram Channel, Twitter, etc. |